


Arizer Solo 3 V2 Review (2026): Best Battery Life. Best Value. Best All-Glass Vapor.

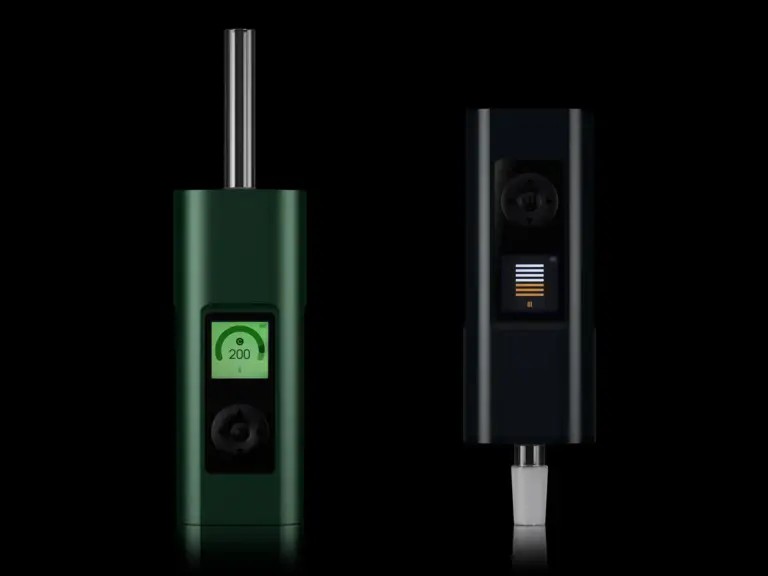
Arizer has been building reliable dry herb vaporizers in Waterloo, Ontario since 2009. The Solo 3 V2 (2025) is the biggest leap the brand has made in a decade: a completely redesigned heater, dual operating modes (Session + On-Demand), the new XL glass stem system, and 3 hours of battery life in one package.
This review is based on verified specifications from Arizer’s official support documentation. We cover the things other reviews miss: the mandatory first-use burnoff, why the 15-second heat-up does not mean 15 seconds to good vapor, the honest comparison between XL and standard stems, and a clear guide to which mode to use when.
For a full comparison of all portable vaporizers we carry, see our Best Portable Dry Herb Vaporizers guide.
The Arizer Solo 3 V2 is the best value portable dry herb vaporizer in 2026. At $239.99, it delivers the longest battery life of any portable (3 hours / 10+ sessions), the purest vapor quality from its all-glass path, 15-second heat-up, and both Session and On-Demand modes. The main trade-off is size — it is not pocketable and is best suited for home use and travel with a bag. The first-use burnoff is mandatory. The draw resistance is higher than the Venty. For home users who want maximum battery life and flavor quality at under $250, nothing comes close.
Table of Contents
- 1 Full Specifications
- 2 What’s in the Box
- 3 Mandatory First Use: The Burnoff
- 4 Design & Build Quality
- 5 Why the All-Glass Vapor Path Matters
- 6 Session Mode vs On-Demand Mode – Which Should You Use?
- 7 XL Stem vs Standard Stem – Honest Comparison
- 8 Loading Guide – The Technique That Matters
- 9 Battery Life & Charging
- 10 Vapor Quality
- 11 Using the Solo 3 V2 with a Water Pipe (WPA)
- 12 Using Concentrates in the Solo 3 V2
- 13 Cleaning & Maintenance
- 14 Arizer Solo 3 V2 vs Venty – Which Should You Buy?
- 15 Pros & Cons
- 16 Who Should Buy the Arizer Solo 3 V2?
-
17 Frequently Asked Questions
- 17.1 Is the Arizer Solo 3 V2 worth it in 2026?
- 17.2 How do I turn on the Arizer Solo 3 V2?
- 17.3 What is the difference between Session Mode and On-Demand Mode?
- 17.4 Are XL stems better than standard stems?
- 17.5 Can I use my old Arizer Air or Solo 2 stems with the Solo 3 V2?
- 17.6 Can the Solo 3 V2 be used with concentrates?
- 17.7 What is the warranty on the Arizer Solo 3 V2?
- 17.8 Does the Solo 3 V2 work while charging?
Full Specifications
| Specification | Detail |
| Manufacturer | Arizer, Waterloo, Ontario, Canada |
| Version | Solo 3 V2 (released April 2025) |
| Material Compatibility | Dry herb only (no concentrate accessories available) |
| Heating System | Instant Ceramic Hybrid: 80% Convection / 20% Conduction |
| Temperature Range | 50°C–220°C / 122°F–428°F (1°C/1°F precision) |
| Heat-Up Time | 5–15 seconds to set temperature (see note below) |
| Operating Modes | Session Mode + On-Demand Mode |
| Session Mode Presets | 3 fully customizable preset temperatures |
| On-Demand Presets | 3 fully customizable preset temperatures + adjustable draw timer (5–25 sec) |
| Session Duration | Adjustable 5–20 min (default 10 min) |
| Battery | ~3400mAh internal (non-replaceable) |
| Battery Life | Up to 3 hours continuous (Session Mode) / 100+ On-Demand draws per charge |
| Charging | USB-C PD with pass-through charging |
| Charge Time | ~90 minutes (0→100% with included 3A adapter) |
| Vapor Path | 100% borosilicate glass (stems + WPA) |
| Body Material | Anodized aluminum alloy |
| Chamber (Standard stem) | ~0.15g (0.1–0.2g typical load) |
| Chamber (XL stem) | ~0.3g (up to ~0.6g maximum) |
| Water Pipe Adapters | 14mm frosted glass WPA (Original + XL, both included) |
| Display | Large color LCD; auto-inversion (screen + button controls) |
| Dimensions | Approx. 4.6 × 3.5 × 11.5 cm (body only, without stem) |
| Weight | Approx. 200–210g (body only); ~291g with XL stem installed |
| Warranty | Lifetime: heating element | 2-year: workmanship/defects | 1-year: battery | Glass: not covered |
| Price at Haze | $239.99 (was $309.00) |
What’s in the Box
- Arizer Solo 3 V2 Vaporizer
- USB-C Charger (5V, 3A)
- 1× XL Glass Aroma Tube (90mm, straight stem)
- 1× XL Frosted Glass Aroma Tube (14mm WPA for water pipe)
- 1× Original Air/Solo Glass Aroma Tube (90mm, straight stem)
- 1× Original Air/Solo Frosted Glass Aroma Tube (14mm WPA)
- 4× Silicone Stem Caps
- 4× PVC Travel Tubes with caps (2× 70mm, 2× 90mm)
- 1× Stainless Steel Stirring Tool
- 4× Stainless Steel Filter Screens
- Solo 3 V2 Owner’s Manual
Mandatory First Use: The Burnoff
Before loading any herb for the first time:
- Insert a stem with no herb loaded
- Power on the Solo 3 V2
- Set to maximum temperature (220°C / 428°F)
- Run the device for 8–10 minutes without inhaling
- Allow to cool completely
- Repeat if you notice any unusual taste on the first real session
This is standard practice for all vaporizers with ceramic heating elements. Arizer recommends it in their official documentation. VaporizerWizard, POTV, and Tools420 all mention it but bury it in their reviews. We put it first because skipping it is the most common reason for first-time user disappointment with Arizer devices.
Design & Build Quality
The Solo 3 V2 body is anodized aluminum alloy – not plastic. This is meaningful: aluminum dissipates heat better, is more scratch-resistant, and feels more premium than the PEEK plastic used on the Mighty+ and Venty. The device never gets uncomfortably warm during sessions.
Arizer has a 15-year track record of exceptional build longevity. Original Solo units from 2010 still work. The brand’s philosophy is engineering for the long term rather than planned obsolescence, which the lifetime warranty on the heating element reflects.
The display is a large color LCD with multiple brightness levels. The screen and button controls automatically invert when the device is turned upside-down – critical for WPA (water pipe) use where the device sits on top of glass. This is not just a cosmetic flip; the arrow controls also remap so button directions remain intuitive in the upside-down orientation.
One ergonomic note: the button layout (center M button with a ring of Up/Down/Left/Right) has a learning curve. Users with larger fingers may find precise button selection difficult. The startup sequence (hold M, then Left-Up-Right) can now be disabled in the V2, which resolves the most common interface complaint from the original Solo 3.
Why the All-Glass Vapor Path Matters
Every other vaporizer in this review series – the Venty, Mighty+, Crafty+ — uses PEEK plastic in the vapor path. PEEK is medical-grade and safe, but it is not glass. Glass does not react with vapor compounds and does not retain flavor from previous sessions.
Borosilicate glass (the same material used in laboratory equipment and high-end cookware) is specifically chosen for its thermal resistance and chemical inertness. When vapor passes through the glass stem, only glass touches the vapor. No metal, no plastic, no ceramic — just glass from the herb cup through the mouthpiece.
The practical result: the Solo 3 produces the most ‘clean’ flavor representation of any vaporizer we carry. If you are using high-quality herb, you will taste the terpene profile more clearly through the glass path than through any other material. This is the Solo 3’s defining characteristic and the reason Arizer users are loyal to the platform.
Session Mode vs On-Demand Mode – Which Should You Use?
The Solo 3 V2 is one of the very few portable vaporizers that properly executes both Session Mode and On-Demand Mode on a single device. This is a significant engineering achievement – even the Venty is session-only.
Session Mode
Session Mode heats to your set temperature and maintains it for a fixed duration (5–20 minutes, default 10 min). The herb bakes continuously for the duration of the session. Draw whenever you want – no waiting between hits, no re-triggering the heater.
- Best for: relaxed at-home sessions, watching TV, group passing, finishing a bowl completely
- Load: either standard or XL stem
- Temperature: start at 356°F / 180°C for flavor; step up to 390°F / 199°C or 410°F / 210°C to complete extraction
- Vapor from first hit: consistent and dense from the start
- Bowl done in: 4–8 hits over 3‒6 minutes depending on temperature and load
On-Demand Mode
On-Demand Mode heats to your set temperature only when triggered (press Up button). A countdown timer controls how long the heater stays on (5–25 seconds, default 15). After the timer expires, the heater shuts off and the herb stops baking.
- Best for: micro-dosing, single hits, group situations where you want to preserve the bowl between hits, WPA (water pipe) use
- Load: standard stem recommended for most on-demand sessions (see XL stem comparison below)
- Temperature: III (middle preset) for balanced vapor; higher for dense extraction
- Vapor from first hit: lighter than session mode – requires additional 15–20 sec after trigger for herb to warm up
- Residual heat: after the timer expires, 1–2 more draws without triggering are possible from residual heat
Which Mode is Better?
| Scenario | Recommended Mode | Why |
| Full solo session at home | Session Mode | Consistent vapor throughout; no re-triggering required |
| Quick single hit between tasks | On-Demand Mode | Bowl preserved; herb doesn’t overcook between hits |
| WPA + water pipe sessions | On-Demand Mode | Precise control; avoid combustion risk at high temps |
| Group passing | Session Mode | No need to manage timer; always ready for next person |
| Micro-dosing | On-Demand Mode | Heat only when needed; use partial bowl across multiple sessions |
| Maximizing one bowl’s extraction | Session Mode | Step up through temperatures 180→199→220°C over the session |
XL Stem vs Standard Stem – Honest Comparison
The XL stem is the headline feature of the Solo 3, but the relationship between stem size and performance is not straightforward. Here is the honest assessment.
| Factor | Standard Stem | XL Stem |
| Herb capacity | ~0.1–0.2g | ~0.3g (up to 0.6g packed) |
| Vapor density | Higher density per hit | Lower density per hit (more herb, same heater) |
| Extraction evenness | More even (herb closer to heater) | Less even (top of bowl further from heater) |
| Draw resistance | Lower | Higher (more herb = more restriction) |
| Hits to finish bowl | 3–6 hits | 5–10 hits |
| Best mode | Either | On-Demand or Session, but requires longer sessions |
| Best for | Solo sessions, precision users, on-demand use | Group sessions, heavy users, extended sessions |
Loading Guide – The Technique That Matters
Loading the Arizer Solo 3 correctly produces noticeably better results than loading casually. The method matters because the herb needs to contact the heat source consistently.
Recommended Loading Method
- Use a medium grind – not too fine (restricts airflow), not too coarse (reduces extraction efficiency)
- To load the standard stem: turn the stem upside down and jab the bowl cup into your ground herb directly. Give it a half-turn to pick up herb into the cup. This is faster and cleaner than spooning.
- For XL stem: fill from above, using the stir tool or a small scoop
- Gently tamp the herb until there is approximately 2mm of space below the top rim of the bowl. Do not over-compress.
- Insert the stem into the device and begin your session
Battery Life & Charging
Battery life is the Solo 3 V2’s strongest specification relative to the competition. The approximately 3400mAh internal battery delivers:
- ~3 hours continuous use in Session Mode
- ~100+ draws in On-Demand Mode (translates to 10–18 sessions depending on draw length and frequency)
- Multiple days of casual use without recharging for users who vape 1–2 sessions daily
The charging experience has been significantly improved in the V2. USB-C PD (Power Delivery) replaces the older proprietary charger from previous generations. The included 3A adapter charges from 0 to 100% in approximately 90 minutes, and 0 to 50% in about 30 minutes.
Pass-through charging is supported: the Solo 3 can be used while plugged in. Unlike the Mighty+ which requires the Supercharger for full pass-through, the Solo 3 V2 handles pass-through on any USB-C PD charger.
Vapor Quality
The all-glass vapor path defines the Solo 3’s vapor quality. The herb sits in glass, heated by ceramic-adjacent convection airflow, and vapor travels through glass to the mouthpiece. No plastic, no metal, no taste interference.
At low temperatures (180°C–190°C / 356°F–374°F), the Solo 3 produces lighter, highly flavorful vapor with exceptional terpene clarity. This is the temperature range where glass path advantage is most apparent. Users switching from a Mighty+ or Venty at this temperature range will notice a cleaner, more nuanced flavor profile.
At medium temperatures (190°C–205°C / 374°F–401°F) the Solo 3 produces dense, potent vapor. This is the daily driver range for most experienced users.
At high temperatures (205°C–220°C / 401°F–428°F), the Solo 3 can produce very aggressive extraction with a roasty character. The herb will be dark to black at maximum temperature. This range is for complete extraction at the end of a session or for heavy users chasing maximum potency.
Temperature Guide by Use Case
| Temperature | Character | Best For |
| 180°C–185°C / 356°F–365°F | Light vapor, exceptional terpene clarity | Flavor-first users; CBD; first session of the day |
| 185°C–200°C / 365°F–392°F | Balanced flavor + potency; dense clouds | Daily use sweet spot; most users and strains |
| 200°C–210°C / 392°F–410°F | Dense vapor, roasty character, strong effects | Heavy users; high-CBD strains; group sessions |
| 210°C–220°C / 410°F–428°F | Maximum extraction; dark AVB | End-of-bowl completion; maximum potency |
Using the Solo 3 V2 with a Water Pipe (WPA)
The Solo 3 V2 includes two frosted glass WPAs (Original and XL size), both with 14mm male joints that connect to any 14mm female glass piece. This is one of the best WPA setups of any portable vaporizer because the vapor path remains 100% glass from herb cup through mouthpiece through water.
For WPA use, the device sits upside-down on top of your glass piece. The auto-inversion feature automatically flips both the display and button controls so everything remains intuitive. The button remapping is the key improvement over the Air MAX’s earlier inversion feature, which only flipped the screen.
- Best glass pairing: compact dab rig or bubbler with 14mm female joint
- Use On-Demand Mode for WPA sessions – precise control over extraction prevents combustion
- Start at a lower temperature than usual – water cooling makes vapor feel lighter, so you may be tempted to increase temperature unnecessarily
- The XL frosted WPA is recommended for WPA sessions with a larger group – bigger load means more hits before reloading
Using Concentrates in the Solo 3 V2
The Solo 3 V2 is designed exclusively for dry herb and has no dedicated concentrate accessories. However, concentrates can be used with the ‘sandwich’ method:
- Pack a small amount of ground herb into the bottom of the glass bowl cup
- Place a small amount of concentrate on top of the herb layer
- Cover with another small layer of herb
- Insert the stem normally and vape
The herb layers contain the concentrate, preventing it from dripping down into the ceramic heating element. The concentrate melts into the surrounding herb as the session progresses.
Cleaning & Maintenance
The Solo 3 V2 is one of the easiest vaporizers to clean of any device we carry. The reason: the herb never touches the device body. All residue accumulates in the glass stems and the chamber opening. The heating element itself stays clean.
After Every Session
- Remove the glass stem immediately while still warm
- Use the stir tool to push out the AVB (already vaped botanical) into the trash
- Use the included cleaning brush to brush the stem hole clear of any particles
- Brush the chamber opening gently
Glass Stem Cleaning (Weekly for Daily Users)
- Place the glass stems in a small container of 99% isopropyl alcohol
- Let soak for 10–20 minutes
- Rinse with warm water
- Allow to fully air-dry before next use
The ceramic heating element and chamber require only an occasional ISO swab with a cotton swab to clean the walls. This is rarely needed if you empty stems promptly after sessions.
Arizer Solo 3 V2 vs Venty – Which Should You Buy?
These are the two highest-performing portable vaporizers in our lineup. They compete directly in performance but differ significantly in format, experience, and price.
| Feature | Solo 3 V2 ($239.99) | Venty ($419) |
| Vapor Path | 100% borosilicate glass | PEEK plastic |
| Vapor Flavor Quality | Superior at low temps | Excellent but slightly less nuanced |
| Battery Life | ~3 hours / 10+ sessions | ~60 min / 10–14 sessions |
| Heat-Up Time | 15 sec to temp (+20 sec for herb) | ~20 sec to vapor-ready |
| On-Demand Mode | Yes | No |
| Airflow | More draw resistance | Wide-open 20 L/min (adjustable) |
| Portability | Not pocketable (glass stem separate) | Pocketable without accessories |
| App/Bluetooth | No | Yes (S&B Web App) |
| Concentrate Support | Sandwich method only | Sandwich method only |
| Price | $239.99 | $419 |
| Best For | Home use, flavor, maximum battery | On-the-go, open airflow, convenience |
Pros & Cons
- Longest battery life in category: ~3 hours / 100+ draws
- All-glass vapor path — cleanest, most flavor-true vapor
- Both Session and On-Demand modes (rare on portables)
- 15-second heat-up time
- Massive XL stem option (0.3-0.6g capacity)
- Older Air/Solo glass stems are compatible
- 14mm WPA included in box (Original + XL)
- Screen and button controls auto-invert for WPA use
- USB-C PD with pass-through (charges via any USB-C PD brick)
- ~90 min full charge time
- Aluminum body — premium feel, good heat dissipation
- Made in Canada; 15+ year brand reliability track record
- Lifetime warranty on heating element
- Not pocketable — best for home and bag carry only
- Glass stems are fragile — breakage risk without travel tubes
- Higher draw resistance than Venty
- First-use burnoff mandatory (or sessions taste bad)
- On-Demand mode first hit is lighter (herb needs extra warm-up time)
- Learning curve on interface; startup sequence (can be disabled in V2)
- No app or Bluetooth
- No dedicated concentrate accessories
- Button layout difficult with larger fingers
Full Performance Scores
Best Value Portable 2026
Who Should Buy the Arizer Solo 3 V2?
Strong fit for:
- Home users who want the best battery life in a portable vaporizer
- Flavor-focused users who want the purest vapor quality from a glass vapor path
- Users who want both Session and On-Demand mode on a single device
- WPA enthusiasts – the glass-on-glass connection and auto-inversion make this the best portable for water pipe use
- Arizer Air or Solo 2 owners who want a significant upgrade while keeping compatible stems
- Users on a budget relative to the Venty — nearly identical performance category at $180 less
Not the right fit for:
- Users who need a pocketable device for daily carry – see Crafty+ or PAX Plus
- Users who want open, low-resistance airflow – the Venty is significantly more open
- Users who want concentrate support beyond the DIY sandwich method
- Users who want smartphone app control or Bluetooth customization
Frequently Asked Questions
Is the Arizer Solo 3 V2 worth it in 2026?
Yes, especially at $239.99. The combination of 3-hour battery life, all-glass vapor path, Session + On-Demand modes, and 15-second heat-up is unmatched at this price point. The Venty performs at the same tier but costs $180 more and does not have On-Demand mode or a glass vapor path.
How do I turn on the Arizer Solo 3 V2?
Hold the center M button for 3 seconds, then press Left, Up, Right in sequence. This is a child-safety lock. In the V2, this sequence can be disabled in Settings so the device powers on with just a 3-second M button hold.
What is the difference between Session Mode and On-Demand Mode?
Session Mode maintains your set temperature continuously for a fixed duration (up to 20 min), allowing you to draw whenever you want. On-Demand Mode heats up only when triggered by a button press, for a set timer (5–25 seconds), then shuts the heater off. Session Mode is better for full relaxed sessions; On-Demand is better for quick hits, preserving a bowl across multiple sessions, and WPA use.
Are XL stems better than standard stems?
Not definitively. XL stems hold more herb (0.3g vs 0.15g) but the extra capacity sits further from the heating element, producing less even extraction. Standard stems deliver denser, more consistently extracted vapor hit-for-hit. XL stems are better for group sessions and extended use; standard stems are better for solo precision sessions.
Can I use my old Arizer Air or Solo 2 stems with the Solo 3 V2?
Yes. Arizer maintained the same stem diameter across all generations. Original Air and Solo stems (both regular and the glass mouthpieces) are compatible with the Solo 3 V2. Note that XL stems will not function properly in older devices because those chambers are not deep enough to properly heat the XL portion of the bowl.
Can the Solo 3 V2 be used with concentrates?
Not officially. The Solo 3 has no dedicated concentrate accessories. The community-preferred method is the sandwich technique: thin layer of herb, small amount of concentrate, thin layer of herb on top. Hold the stem with concentrate end up during the session. Excess concentrate can drip into the heating element if the stem is held incorrectly.
What is the warranty on the Arizer Solo 3 V2?
Lifetime warranty on the heating element. 2-year warranty on workmanship and defects. 1-year warranty on the battery. Glass stems and accessories are not covered under warranty but are inexpensively replaceable.
Does the Solo 3 V2 work while charging?
Yes. USB-C pass-through charging allows the device to be used while plugged into any USB-C PD charger. This works on any compatible USB-C PD adapter, unlike the Mighty+ which requires the specific Supercharger for full pass-through.
